With their mild onion flavor and graceful foliage, chives delightfully enhance any herb garden or kitchen window sill. Whether you employ them fresh in salads, soups, or garnishes; or dry for future use – their versatility reigns supreme: they are easy to cultivate and introduce an explosion of taste to numerous dishes. Crucially—planting chives at the appropriate time is imperative for a successful perennial herb harvest.
This comprehensive guide delves into the optimal timing for chive planting, taking into account climate, soil conditions, and growth habits. It aims to assist you in cultivating robust and productive chive plants.
Understanding Chives
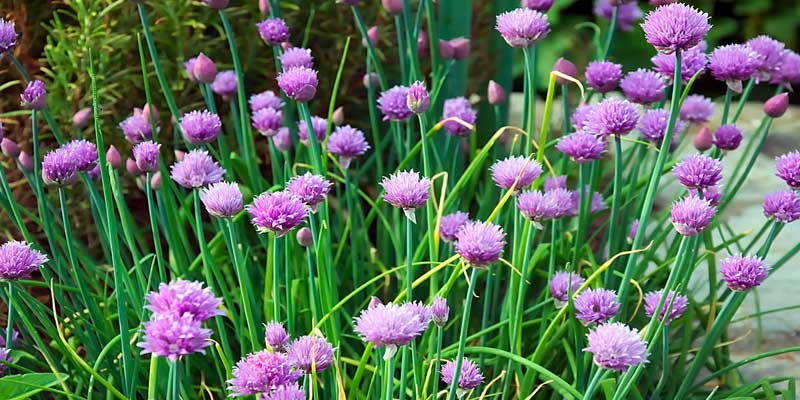
Members of the onion family (Alliaceae), chives (Allium schoenoprasum) are native to Europe, Asia, and North America. Their slender hollow leaves and globe-shaped clusters of pink to purple flowers characterize these herbaceous perennials.
We value chives for their adaptability, resilience, and capacity to flourish in diverse growing conditions; such attributes have elevated their popularity as additions not only in herb gardens but also in container gardens, and even landscapes.
Timing for Planting Chives
Several factors including climate, soil temperature, and local growing conditions, dictate the optimal timing for chive planting. Although you can sow chives throughout various seasons: certain periods offer more favorable conditions that promote their successful establishment and growth.
Spring Planting
In most regions, planting chives in the spring allows them to establish themselves before summer’s heat intensifies; thus, it is an ideal time for such a task. However, in cooler climates characterized by harsh winters, one must exercise patience: wait until not only has the danger of frost passed but also soil temperatures have risen to at least 50°F (10°C) before considering outdoor chive plantation.
Those situated in milder winter zones within warmer climatic conditions can commence their springtime sowing earlier, typically starting from February or March onwards.
Fall Planting
In regions characterized by moderate climates and relatively gentle winters, the suitability of fall for chive planting increases. By opting to plant in early to mid-fall, one strategically allows roots time to establish before winter dormancy sets in.
To ensure optimal growth before encountering cold weather conditions, aim for a minimum interval of 4-6 weeks between the chive plantation and the anticipated initial frost date.
Year-Round Planting in Mild Climates
Chives thrive in Mediterranean climates or other regions boasting mild year-round temperatures: one can plant them almost any time of the year, provided suitable soil moisture and temperature conditions prevail. However, caution should be exercised during the hottest, driest months; planting then can stress plants and impede establishment.
Rather, choose to sow these versatile herbs either in spring—or—in fall: both seasons offer moderate temperatures along with an increased likelihood for abundant rainfall.
3 Factors Influencing Planting Time
Several factors can influence the timing for planting chives:
1. Soil Temperature
Optimal germination and growth of chives occur in well-drained soil with a minimum temperature of 50°F (10°C). However, if we plant chives in excessively cold soil, their root development and initial growth may experience delays; this could result in poor establishment and stunted plant progress.
2. Frost Risk
While chives do exhibit a general tolerance for light frosts, we must note that young seedlings might fall prey to freezing temperatures and suffer damage. Hence, it is prudent to delay the outdoor plantation of chives until the threat of spring frost recedes – this precaution holds particular importance in regions manifesting colder climates.
3. Growing Conditions
Plant chives optimally in a sunlit to partially shaded location, ensuring the soil possesses excellent drainage and maintains its pH levels between 6.0 to 7.0; however, avoid planting them in areas susceptible to waterlogging or with persistently moist soil – such conditions may trigger root rot and other fungal diseases.
Companion Planting
Consider planting chives alongside other herbs, vegetables, or flowers that share complementary growth habits and offer mutual benefits: for instance, companion plants like parsley; basil; and marigolds not only assist in pest control – they also attract beneficial insects. Moreover — these partnerships can significantly enhance soil health.
Planting Methods
There are several methods for planting chives, including:
1. Seeds
Directly sow chive seeds into the prepared garden bed or containers. Ensure a depth of ¼ to ½ inch (6-12 mm) for each seed, and space them apart by 6-8 inches (15-20 cm). Maintain consistent moisture in the soil, ensuring it is not waterlogged; this should be upheld until seedlings emerge, a process that typically occurs within 7 to 14 days.
2. Transplants
Purchase young chive plants from nurseries or garden centers for transplantation into the garden or containers; ensure that you plant these transplants at an equal depth to their original growth in respective pots. Space each transplant approximately 6-8 inches apart, maintaining a healthy distance between them. Water thoroughly after planting to help them establish in their new environment.
3. Division
In early spring or fall, one can divide established chive clumps to initiate the growth of new plants. To do this, it is important to carefully dig up the clump and then separate it into smaller sections; each section should have several healthy shoots and intact roots.
Prepare the soil, and replant the divisions in it, ensuring it waters profusely and provides suitable care; this will foster root development and growth.
Maintenance Tips For Chives
After planting chives, provide the following care to promote healthy growth and development:
1. Watering: Keep the soil consistently moist by watering it regularly, particularly during dry spells or hot weather. Infrequently but deeply water chive plants and permit a slight drying out of the soil between each watering; this strategy prevents waterlogging.
2. Fertilizing: In early spring, lightly fertilize chive plants with a balanced fertilizer or compost; this provides the essential nutrients for growth. However, be cautious of over-fertilizing: it may result in excessive foliage growth, potentially compromising flavor quality.
3. Mulching: Apply a layer of organic mulch, straw, or shredded leaves, for instance, around chive plants; this promotes moisture retention, suppresses weeds, and regulates soil temperature. Moreover, it serves as a protective measure against temperature extremes and fluctuations for the roots.
4. Harvesting: Begin harvesting chive leaves: once the plants establish themselves and develop an adequate number of foliage, a process known as harvesting. Snip these leaves near the plant’s base using either scissors or garden shears; it is advisable to leave a few inches of growth intact, thereby stimulating regrowth.
Conclusion
Gardeners must prioritize the precise timing of chive planting to ensure successful establishment and growth. They can achieve this by taking into account several factors: climate, soil conditions, and local growing circumstances. Optimal plantings promote robust health in their greenery; be it from seed transplants, or even divisions. The key lies not just with initial care but also with ongoing maintenance post-planting stage.
Properly timed and meticulously cared for, chive plants thrive in gardens, containers, and landscapes. They offer a consistent supply of fresh leaves with delightful flavor throughout the year.
Leave a Reply